OSINT: Advanced tinder capture
OSMOSIS 2017 conference in Myrtle Beach, South Carolina
OSMOSIS
Last October I had the pleasure of speaking about OSINT on social media investigations at the OSMOSIS conference in Myrtle Beach, South Carolina. During that talk I demonstrated using an Android Emulator to spoof my location and do reconnaissance on the Tinder dating app. Speaking with some of the investigators at the conference I found out that some people's setup for this process gets broken by app updates. So this post shares the specifics of my emulator setup and explores OSINT methods for capturing evidence from Tinder.
Emulator Setup for tinder
This is the general setup I'm using and the version numbers of the programs:
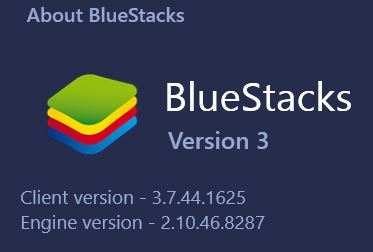
Bluestacks Version 3 specifics
Tinder app APK version 7.5.2
Fake GPS Free app version 4.3.2
There may be other variables that could impact your results (like host operating system and some of the emulator's google services drivers), but as 1/11/18, my setup is still working on a standard free Tinder account . I recommend avoiding updates on your capture system once you get a working variation.
Using the Emulator
Using the system is simple once you have the apps installed in the emulator.
Running Bluestacks, launch the 'Fake GPS Free' app and then change the location to anywhere else:
Nice day for a quick trip to the Netherlands
Clicking the orange 'play' button on the bottom right side of the screen will start the emulator's location beacon. Then we launch the Tinder app:
We are now seeing active users on the app within 2 miles of Amsterdam (The distance and people filters can be changed inside the Tinder app)
Exporting Evidence
For preservation there is always screenshots from your host OS (like I use for this blog entry). Bluestacks has its own screen capture capability as well, but my preferred method of grabbing evidence like this is capture with Wireshark. Wireshark is a network packet capture tool with a broad range of infosec uses. What I like about using it for Tinder capture is the ability to export bulk images quickly. Wireshark can seem overwhelming to those who haven't used it, but once you install it the process is quite simple to dump all the profile photos you encounter in your Tinder browsing session.
After a packet is captured in Wireshark go to: File - Export Objects - HTTP
Wireshark gives you the option to 'Save All'
Now you have a directory of the profile photos you browsed in your emulator session
Using the Web Version
In late 2017 Tinder fully launched the browser based version of the app. So if you don't want to setup an emulator you can do reconnaissance from your browser as well. (location spoofing can prove more challenging in-browser)
Tinder from inside a chrome browser
Being in a web browser we now have the ability to run a browser capture tool such as Nimbus Screenshot or Hunchly. We also have full access to things like view page source and using reverse image searches if necessary for OSINT.
Reverse Image Searching
Without calling out an innocent target, let's find somebody that may be using a fake profile picture. The accounts I typically find fake photos on usually contain only 1 photo on the profile... like this one:
Bitcoin lulz... nice.
Again the advantage we have when working in a browser is in-depth OSINT analysis. Right click directly on the image of the man in the pool and select 'Inspect'
Dev Tools view of the Tinder page in Chrome
Now right click on the link at the top of the Elements window which is the direct link to the profile photo. Select 'Copy link address'. Open a new browser tab and paste the link.
From there you can run your photo analysis tool of choice. It is easy enough to right click and 'search google for this image'
We can also paste the direct link into a reverse image tool like Tineye:
https://tineye.com/search/5688cefe20f1a8f5bbdde741bf8c9db1f3491c67/
Within both of those searches its apparent 'Jennifer' took the photo from one of several sites that was using a stock image from Getty Images.
https://www.istockphoto.com/ca/photo/friends-enjoying-next-to-the-edge-of-pool-with-beer-gm801526672-129967143
Just like the 'Disloyal Boyfriend' meme, we can find more images in the same stock image series:
Maybe that's Jennifer... probably not.
I hope you enjoyed this overview of OSINT techniques for Tinder. If you have any comments or your own techniques to share please drop me a line on Twitter @baywolf88
Happy OSINTing


